15.02.2017 &
16.02.2017 (Week 3)
Adrian Charles Chee Yew Chen (300666425)
Introduction to Photography
Adrian Charles Chee Yew Chen (300666425)
Introduction to Photography
Exercise 3: Zone
System
Lecture:
Mr Vinod began this week's lecture
by having us recap everything we have learnt so far since the first class. He
questioned us about aperture, ISO and shutter speed. Mr Vinod also randomly
picked students one by one to give the main stops for aperture as well. After a
quick but thorough recap, we moved on to today's lecture, which according to Mr
Vinod, is much more difficult than the past lessons. He taught us the Zone
System. Mr Vinod stated that the in-built light meter of a camera is somewhat
'dumb' and proceeded to explain to us why he had said so. The reason being, the
in-built light meter does not know exactly what it is that we, as photographers
are focusing on and are trying to achieve. The in-built light meter generalizes
and standardizes every subject into the 'optimum' tone, which is the default,
Zone 5, when the exposure is at 0 in the in-built light meter. Mr Vinod then
took us out of class, chose Danial as the model of the day and began to teach
us how to differentiate between zones, how to sketch and label the zones and
what we needed to do after determining the zones and readings of each zone.


The above picture is what the Zone system is mainly about. To achieve the right amount of exposure according to the tones that we want for our picture. Mr Vinod taught us how to roughly sketch and label the different zones according to our subject and what we, as photographers, want to achieve in our captured photographs. Because we know that following the in-built light meter will always give us Zone 5, we need to decide what zone a certain point of focus is beforehand and readjust our shutter speed accordingly to match the Zone we chose to label that specific point of focus with. As an example, in the case above, we labeled our point of focus as Zone 6. Hence, we needed to readjust our shutter speed by moving 3 clicks to the left (1 main stop) to overexpose the point of focus a little bit so that it is the right exposure for a Zone 6 subject.

The image above is another shot we took of Danial while trying to fully
understand and practise the Zone System. At the end of the day, Mr Vinod
gave us an exercise to do when we got back home.
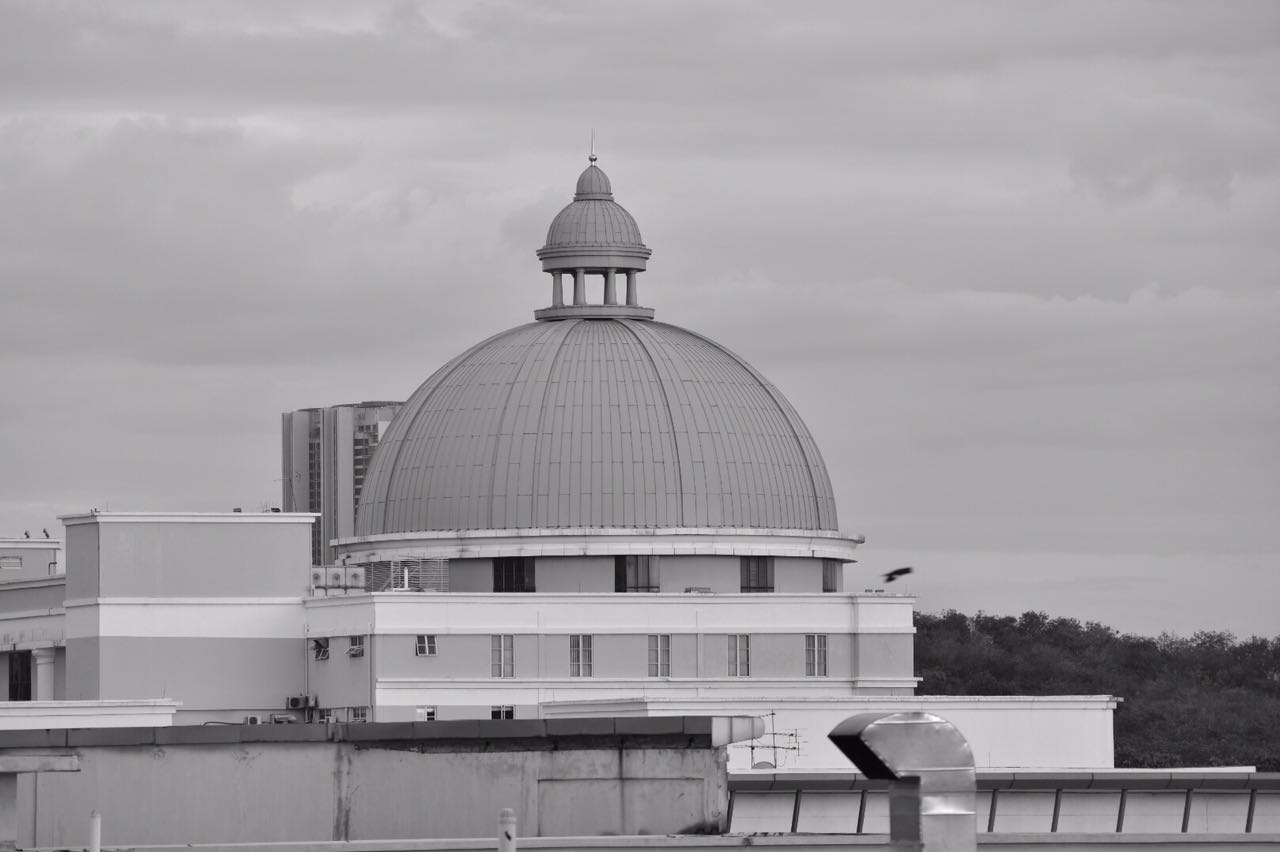
We had another class the following day. We did not have any lecture during this class. Instead, Mr Vinod showed us Ansel Adam's works and instructed us to go out of the classroom and try to practise what we learnt yesterday on our own. I chose SEGi University's Dome to be the main subject in my photograph. The images below are the ones taken with perfect exposure, supposed exposure according to the Zone System and a rough sketch of the main subject in my image as well as the separation of zones in the picture respectively.


Instructions:
Having learned that the camera light
meter is dumb, because it gives you an average or optimized (middle grey; zone
5) exposure irrespective of the subject matter, execute the plan below to prove
the theory and record you thoughts on the matter in your eportfolio.
Exercise 3a: Zone System
1. Capture three subjects: one light zones, middle zones and dark zones.
2. Take two images for each subject, one exposure according to the camera's light meter and the other according to the zone you believe the image falls under.
3. Ensure that the subjects you choose for each zone area (light, middle dark) have a good range of tones within the zone's area. As an example if you are capturing a subject that falls under the light zone and the subject is a white wall, it is only going to have 1 shade of the light zone, so avoid such subject matters, choose subjects that have a healthy tonal range within the white zone.
---
Exercise 3b
The Ansel Adam's Shot
Choose an image worthy of being
called an Ansel Adam's shot (Still Life, Landscape or Portrait).
In using the Zone System sketch and
write down the perceived zones in the desired image and indicate the ISO,
Aperture and Shutter Speed used. Identify the point of interest and state the
exposure settings recommended by the camera light meter and your improved
settings upon using the zone system. The image captured must fulfill the
following criteria:
3b) Ansel Adams Shot
Marking Criteria: Students must show
evidence of using the Zone System. Student must produce 1 black & white
image that captures depth and richness in tonal value by capturing light,
middle and dark tones while maintaining details (texture and tone) in the dark
and light areas of the image.
Exercise 3a: Zone System
1) Dark subject (before using zone system)

ISO: 800
Aperture: 5.6
Shutter Speed: 1/200 sec
1) Dark subject (after using zone
system)

ISO: 800
Aperture: 5.6
Shutter Speed: 1/1600 sec
2) Gray subject (no change before and after zone system because subject is already in zone 5)

ISO: 800
Aperture: 5.6
Shutter Speed: 1/800 sec
3) Light subject (before using zone system)

ISO: 800
Aperture: 5.6
Shutter Speed: 1/1250 sec
3) Light subject (after using zone system)

ISO: 800
Aperture: 5.6
Shutter Speed: 1/320
Exercise 3b: Ansel Adam Shot


Feedback:
There are no feedback yet for this
week's exercise.
Reflection:
Experience:
I personally found
it pretty fun to do these exercises. It was slightly confusing at first but it
got a little better for me as I try it. I had to retake all my pictures all
over again as well because I did not realize that the white balance settings
was set under 'Fluorescent light' before I shot all of my pictures. After
checking my captured images, I found that the white balance settings was
incorrect and immediately forced myself to delete and redo all of my shots
again with the proper settings.
Observations:
Observations:
While working on
this task, I came to notice that the zone system is not as complicated as it
first seemed when Mr Vinod first explained about it. I also realized that the
in-built light meter moves in the same direction as the zones.
Findings:
Findings:
When I
was doing exercise 3a, I found that taking a picture while following the zone
system will help us to get an image with the right tone as how we see it
according to our own naked eye. As for exercise 3b, I found out that it takes a
lot more than just technical skills to take a great picture with detailed
tonalities. It requires pre-visualization (as mentioned by Mr Vinod) as well as
vision and in a way, instincts.
No comments:
Post a Comment